Program Your Micro: Bit Anywhere With Your Smartphone
Did you know that it is possible to program the micro: bit card with a smartphone? For those who do not know micro: bit, this is a single-board computer (like Raspberry Pi or Arduino) launched by the BBC in 2015. Since then, this nano-computer the size of half a credit card has conquered the world of education in England, but also in the rest of Europe!
Micro: bit is very inexpensive (€ 16.90 incl. Tax), even compared to an Arduino or Raspberry Pi
Micro: bit contains a lot of components:
- 2 microcontrollers
- 1 Bluetooth chip
- 1 digital compass
- 1 accelerometer / gyroscope
- 1 temperature sensor
- 1 micro-USB port
- 1 battery connector
- 2 programmable buttons A and B
- 1 matrix 5 x 5 of 25 individually programmable red LEDs
- 5 input-output rings (analog / digital)
- 20 connection pins (GPIO ports)
Micro: bit is very small (the size of a half-credit card for less than 2mm thick – 6mm, if we include the buttons A and B)
Many compatible accessories have been developed by other manufacturers such as Seeed Studio, Elecfreaks or Kitronic. Micro: bit is even compatible with the Raspberry Pi camera module!
There is a large micro: bit community, and many online resources that allow you to get started very quickly (guides, tutorials, projects)
Programming a micro: bit card is done from a computer, but also from a smartphone or tablet. Our little guide explains this in detail!
Step 1: Download The Micro: Bit Application On Your Device (Smartphone Or Tablet)
The micro: bit application exists for Android and iOS:
- Micro: bit app for Android
- Micro: bit app for iOS
Step 2: Pair The Micro: Bit Card With The Application
The micro: bit card must be supplied (3.3V with batteries, 5V via a USB cable). The LED array will light up if the card is powered properly.
Bluetooth must be activated on your smartphone or tablet.
- Turn Bluetooth on or off on an Android device
- Turn Bluetooth on or off on an iOS device
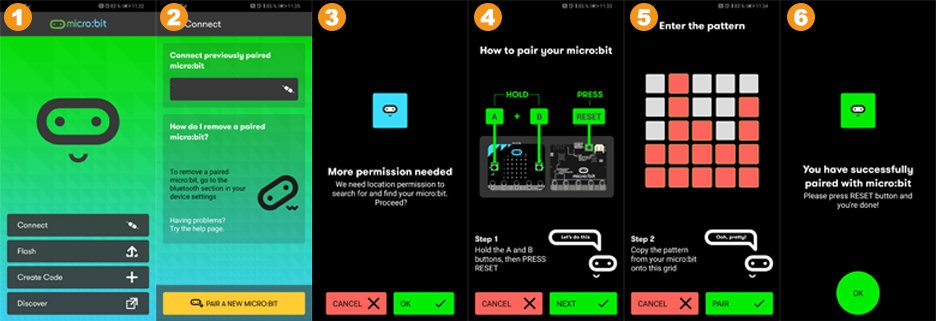
- Open the micro: bit application and press the “Connect” button
- Press the “Pair a new micro: bit” button
- The application may request permission to access certain features of your phone.
- To perform pairing, keep the A and B buttons pressed, and simultaneously press the Reset button (about 2-3 seconds), before releasing it. Then release the buttons A and B.
- A diagram is then drawn on the LED matrix of the micro: bit card, which must be traced identically on the application.
- To finish the pairing procedure, press the Reset button.

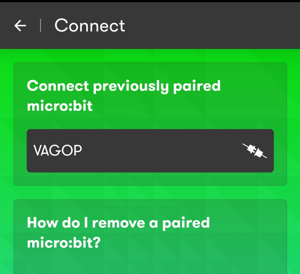
The application names your new card, ours is called VAGOP:

Step 3: Create A Program
As we said above, there are many online resources for micro: bit and it will be very easy to find the first project that you will like to start!
One of the easiest ways to quickly see if your pairing is working is to test the temperature sensor.

To create a micro: bit program on Android, nothing could be simpler! On the main application interface, select “Create code”, this opens the micro: bit website web page from where you can choose the programming language in which you want to code.
Choose between the MakeCode visual editor or the Python editor and enter the code above (you can change the language of the editor by clicking on the “Parameters” icon symbolized by the toothed wheel.
Tap the purple icon at the bottom right of the screen to download the code .hex file to your device.
Step 4: Upload A Program To The Micro: Bit Card
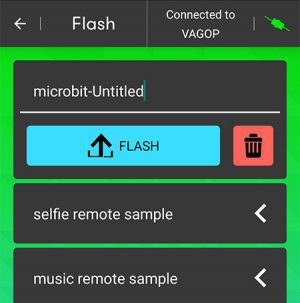
Return to the main interface of the micro: bit application and select “Flash”.

Here you find the list of the micro: bit programs (files in .hex format) saved in your device. Select the program that interests you and press the “Flash” button. The program then uploads to your micro: bit card.
A message will tell you that the upload procedure has worked correctly. If you want to upload a new program to your micro: bit card, you will need to pair it again. As your card has already been paired once, it will be much simpler, you just need to press the name of your card on the main interface.